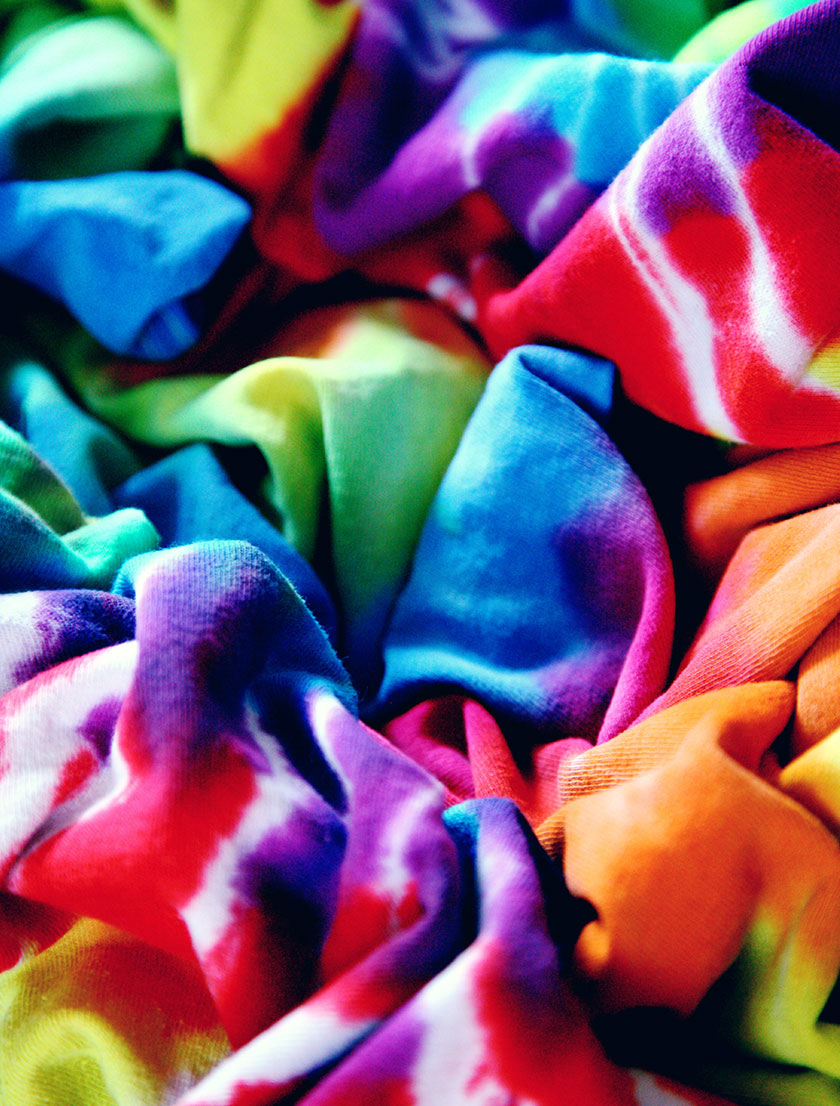
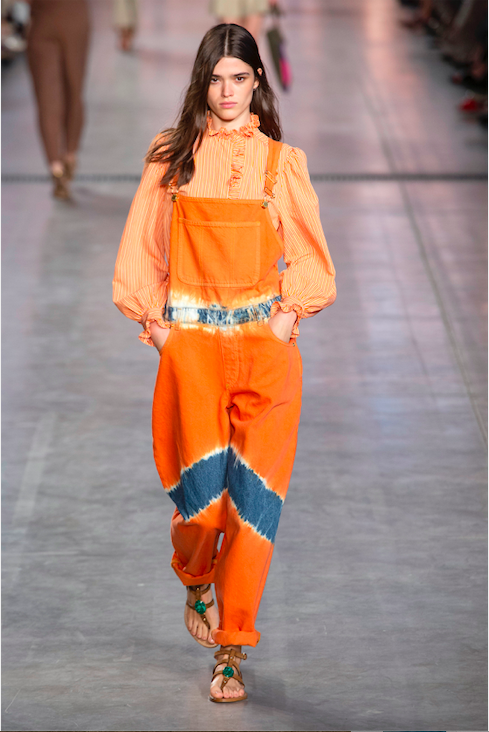
The tie-dye has been the great protagonist of Spring/Summer fashion for a few seasons now. The colourful, sparkling and style mood that recalls the hippie fashion of the 70s has become a real must in the wardrobe of every fashion addicted. In fact, since its origins, linked to a fashion that had nothing to do with haute couture, in recent years it has become a pattern loved also by luxury brands. Just think of Dior who for this S/S 2020 made the tie-dye the great star of accessories and clothes, not to mention Ralph Lauren, Stella Mccartney and Alberta Ferretti who have revisited it in the most unusual shades to give it a sporty allure- one of a kind chic.
-

- Dior SS 20
-
- Alberta Ferretti SS 20
-

- Dior SS 20
But let’s get to the practice, are we still in quarantine for a while, right? How about making tie-dye at home, giving a new look to those t-shirts, jeans and tank tops that we no longer use? Making tie-dye at home is very simple, you will need:
- a one-colour cloth (we recommend starting with a t-shirt)
- bleach or fabric dye
- a basin
- rubber bands
THE STEPS TO REALIZE THE TIE-DYE:
- Take the t-shirt (or the garment you have chosen) wrinkle it in several places and stop the wrinkle with elastic bands, twisting the fabric on itself. (If you do it on a t-shirt you can also make knots in it)
- If you have chosen a coloured T-shirt, dip it in a bowl with bleach and warm water for at least 30 minutes (obviously without removing the elastic bands or knots). If instead, you have chosen a white T-shirt, pour the dye into a bowl and dip each knot or wrinkle in the bowl, wrap the garment and let it rest for 3 or 4 hours so that the colour adheres
- Once the necessary time has elapsed, rinse the garment with cold water and let it dry in the open air. The result? A perfect super cool tie-dye!
PS. to obtain a rainbow effect, take a white T-shirt and dip each knot or wrinkle in bowls of a different colour, then wrap it on itself and rinse. If the desired effect has a concentric texture, start making a larger knot in the centre of the shirt and continue around keeping a distance of about 5 cm.